Showing posts with label Changes. Show all posts

Tuesday, May 25, 2010

A Childhood Dream Realized

Something I have always always always wanted was a kitchen window that was spanned by gleaming glass shelves where I could store knick knacks and pretty things. I convinced myself that it'd take out some of the tedious boredom out of doing dinner dishes and that I just might look forward to the task. My mom (or was it my grandma) had this GORGEOUS puzzle that features coloured glass in front of a leaded glass window with an art deco motif. I loved loved loved it as a kid, and admire it each time I visit my sister (she wound up with it, completed it, and framed it). I think that probably largely shaped my overwhelming desire for the glass shelves full of knick knacks glinting in the sun.

One of the many features that attracted me to the house was the deep alcove behind the sink. I thought it would be a perfect place for my glass shelves. So I added it to The List.

My plan was hatched! There's some edge banding above the travertine back splash, and it juts out about an inch beyond the surface of the alcove sides--the perfect place for some panels!

I decided that the easiest thing to do would be to install some wood panels that were pre-drilled with holes for shelf support pegs. I had some extra MDF lying around from a different project, so I used the handy-dandy JIG IT Shelving Jig that John bought around Christmas time. The jig made it super easy to make uniform holes on both sides of each panel. I decided to include a router detail on the leading edge of the panels, so I attached a ogee bit to the trim router. I had a moment of brilliance, and spray painted a coat of primer on the MDF, then I installed the panels.

I just drilled directly into the sides, and countersunk the screws into the board. A little bit of Spackle and sandpaper, and it's hard to tell from a distance that they were ever there.

Next I filled the gap between the tile edge banding and the panels with some paintable caulking. I laid down a strip of painters tape to make it easier to clean up any wayward caulking (previous experience and the general thought that caulk probably doesn't clean up from travertine very easily necessitated this). After it was all dried, I cleaned up the edges with a straight edge, and got to painting.

Again, my previous experience with painting bookcases reminded me of how much of a bitch it is to keep paint out of peg holes. I've tried using QTips to clean the holes out after each coat of paint, and despite by damnedest efforts, the holes still get clogged to the point that it sometimes takes a hammer to get the pegs in the holes. I had an idea (I've probably seen it used some where before and just forgot, because I doubt I'm the first person to have this frigging brilliant idea, but until I know otherwise, I'll say that I'm the originator of the idea and I'LL SUE ANY ONE'S ASS if they don't give me credit for it!).

Drinking STRAWS!! That's right, ladies and gentlemen, a standard drinking straw fits almost perfectly snugly in a peg hole. I just took a handful of drinking straws, cut them down into 2-3" segments, and crammed them into the peg holes. I then went about my way, painting several (SEVERAL) coats of Behr white paint, and didn't worry about clogging holes. When everything was dry, I pulled the straws out of the holes and removed the painters tape. Most of the peg holes had some horizontal stalagmite growths coming out of them, but a wet rag and a soft scotch scour pad, they came off pretty easily. I suppose a straight edge would work well at cleaning up the holes..and probably a carving tool would work, too. I didn't think to get a picture, so you'll have to use your imagination.

Back in September, I bought some tempered glass shelves at Habitat for Humanity's ReStore for super duper cheap, so I was happy to get them installed. Imagine my disappointment when I discovered that the shelves were about an inch too short and about two inches too narrow to fit in the distance between the panels! ARGH.

But, I had another idea. I took another piece of MDF that was the same width as the panels I had just installed, routered about 1/8" out of the center of the panel so the side profile looked something like this: --_________--. I then cut that panel into 2" strips, and then turned those strips upright and used the table saw to cut a groove down the center of each strip--the groove is about 1" deep. After I got these strips primed and painted, I was set. I used some L-shaped shelf pegs on the panels. After they were installed on both sides, I inserted the strips so the groove I had cut would fit snugly over the shelf pegs. The strips provided the extra length and depth for the tempered glass shelves to sit on, and the routered detail provided a slight lip for the glass to rest between, to make it even more stable. HOORAY! I forgot to take a detailed shot of the supports, so you'll just have to imagine what they look like based on my horrible description.

Here's the finished product. I just put some random stuff up there for now; when I'm able to find more of the knick knacks I have, I'll add them to the collection and actually "stage" the area. You can see the strips I made for the shelves to rest on.

For now, I'm just happy to have my grandma's pretty glass pieces on display!

Click for more pics of the project at different stages. All said and done, I think I spent about $10 on the entire project (including the glass, MDF, paint, pegs and screws--and excluding the wood working equipment :o)

Monday, March 15, 2010

Lipstick on a Pig

Before we moved into our REO house that had sat vacant for over a year, we did a MASSIVE cleaning. John literally vacuumed an entire shop-vac full of dirt and dust off the carpeted floors, and I spent hours scrubbing toilets/showers/sinks/cabinets. We were so happy to be done with the cleaning push and then the move, that we didn't even think about decorating/painting. So for the last year, I've been living with paint colours that hurt my eyes, and no motivation to change things. Notice the GREEN walls.

Last April, I bought some paint when Home Depot was having a sale on Behr, including a mail-in-rebate. And just like to mail-in-rebate, I never got around to painting. Until last week. I taped off the downstairs bathroom, filled cracks/holes in the wall, and painted like a mad woman. Poor Josh had to ask to use the restroom. I decided to just paint the walls and deal with the molding/ceiling later (self-preservation).

I used Behr's Light French Gray (swatch can be found here: # 720E-2) on top of the sagey-green that was in the bathroom when we bought the house. Two coats of paint later, and it looks a bit like a baby-blue, and the cool paint colour is REALLY clashing with the warm undertones of the travertine and slate tiles. So I think I'll be repainting in the future, but not just yet. Maybe next year :o) I want a warmer gray, for sure. Slate blue/gray.

I also put up come of the 6-piece brushed nickle bathroom fixtures that John and I scored at Costco a few weeks ago for $30. I can't find them online, but for the $30, we got a large towel rod, a medium towel rod, a glass shelf, a 2-prong robe hook, a hanging towel loop, and a TP holder. Not too shabby! I bought two sets, so I'm going to mix and match them between the upstairs and downstairs bathroom.
I also got the hang the drawing I completed last week!

Tuesday, March 9, 2010

Know Which Way the Wind Blows

Last April, I bought some paint. I was going to paint the upstairs and downstairs bathrooms, because the SAGEY green in the DS bath and the LEMONY yellow in the US bath were killing me. I'm more of a warm gray/blue kind of a person, and my eyes were telling me they were in pain.
Then, I lost the motivation (because there were other things to do), and the cans of paint sat in the spare bedroom, collecting dust in the corner.
This last weekend, I got off my butt and spackled the holes, filled in the dents and dings, and resolved that this week, after work, I would FINALLY paint the walls in the damned DS bath. It'll be my first painting project as an adult (I remember half-heartedly helping my mom as a kid, though I doubtlessly did more harm than good), and I'm nervous about it (chicken-heart!).
But, I'll give you before and after pictures, so you can ooooh and aaaaah about my madskillz.
In the meantime, this is the drawing I completed the put in the bathroom once it's all painted and purty.
It's based off a photograph I found years ago (and I cannot find the original source of the picture, but here's the image). The original artist took a photo, pushed the contrast up to 11, and then created a negative of the image.
And here's my interpretation:

I think I like the original better--the square orientation is great, and I love how the trees look all wild and yet strangely calm.
Regardless, it's so moooooody, and I think it'll match the lovely french grey I chose for the bathroom, and the sheer size of it will help to fill up the massive blank wall above the tub. I'll post piccies when it's in place.
Click for more flash-tastic pictures of the drawing.

Friday, January 29, 2010

With List in Hand, We Embark on a Journey!

So, one of the main reasons I decided to start this blog was that I thought it would give me motivation to continue doing home renovation projects. It's a lofty goal, and one I hope to continue to work towards.

So, I thought that as extra motivation (because I need it!), I would post the REALLY BIG list of things John and I want to accomplish with this house, from the tiny (switch out the light and outlet plates to all WHITE, instead of a mish-mash) to the huge (pop-the-top on the second story and do a complete gut job of the bedrooms/bathroom/laundry room). And (!) I'll cross things off as we complete them (because, you know, I REALLY love to cross things off lists--so much so that I'll even add things I've already done when I'm writing a list just so I can cross them off------in my defense, I only add things that are directly related to the list, and not just mundane stuff like "wake up" and "brush teeth" and "pet the cat.")

Here's the list. Click the links to see pictures of what I'm talking about. Note that the pictures, unless otherwise noted, are from before we moved in. That's why it's so dirty!

YARDS
Backyard
Build retaining wall at back of yard
Build retaining wall at front of yard
Build walled steps to the leveled backyard
Fill in backyard
Create patio area
Create seating area
Seed with fescue

Front Yard
Patch concrete driveway
Replace concrete driveway
Replace mailbox
Remove spindly coniferous tree from the island and replace with a fast-growing deciduous tree
Create steps from the center of the parking pad up to the porch (right now, you have to walk all the way to either side of the property to walk up to the house—not that big of a deal, unless you’re carrying an armful of groceries in the rain or a screeching howling scratching writhing cat that DIDNOTENJOYTHEVETVISIT!)
Landscape/ xeriscape

Lighting/Electrical
Change out light fixture in DS hallway
Change out light fixture in bonus room
Change out light fixture in DS master and replace with a ceiling fan
Correctly ground all power outlets
Replace standard toggle light switches with more modern, square toggle light switches
Replace standard rounded power outlets with more modern, square power outlets

Painting (Requires wall prep before hand--patching drywall, sealing crown molding)
Paint DS bathroom Check!
Paint dining room
Paint kitchen
Paint foyer
Paint living room
Paint stair well
Paint office
Paint US master
Paint US bathroom

DOWNSTAIRS
All over DS
Replace carpeting with bamboo flooring
Add molding around window frames
Create and install screens to all windows

Kitchen
Add hardware to all cabinets and drawers
Create and install glass shelves in the window alcove/opening above the sink
Create and install floating cabinet above freezer to house bulk items, cook books and display
Add pull-out cabinet organizer to pots/pan lid cabinet
Install shelf dividers in cabinet above fridge
Build new base for oven/range so the surface is flush with counters
Install baseboard and toe kick underneath the dish washer
Buy and install a new sink
Add medallions around light fixtures
Replace dinky light above sink
Add task lighting underneath cabinets
Install bar to hang commonly used utensils from
Replace sliding glass door with French doors
Install new screen door
Extend cabinetry to the right of the fridge and create a kitchen island with more storage/counter space and a breakfast bar
Vent the oven to the outside--cover duct work with a soffit the runs the length of the cabinets

DS Bathroom
Dry-wall over existing door from DS master into bathroom
Move existing door from hallway into bathroom over three feet so it's centered on the wall
Create and install built-in cabinetry on new wall
Remove existing mirror
Add new mirror
Install a new light above the vanity (with its own separate switch)
Install vent fan above shower
Replace backsplash on vanity so it no longer clashes with granite of the countertop
Change height of pendant light
Remove and replace block of tiles on the shower deck that do not match the finish of the surrounding tiles

DS Master
Replace closet doors (mirrored doors just ain't cutting it)
Remove large mirror above fire place

Dining Room
Change height of pendant light
Create and add built-in closet to right of window
Create and add built-in cabinetry to left of window (with an open area for the fish tank to slide into)
Create and add window seat between new built in cabinetry
Dry-wall over existing side light windows into the bonus room
Dry-wall over existing door opening into the bonus room

Bonus Room
Dry-wall over existing side light windows into the dining room
Dry-wall over existing door opening into the dining room
Replace paned door from the hallway with a solid door
Frame in a closet

Living Room
Add air ducting and register to living room
Remove existing fireplace and mantle
Replace fireplace with a gas-insert unit
Create and add new fireplace mantel
Create and add built-in cabinetry on both sides of fireplace, including a closet
Add molding to create a coffered ceiling in the living room and dining room (to hide all the unevenness in the drywall!)
Rewire lights so they work independently of one another and replace light switch with a switch bank
Remove columns that lead into the kitchen--frame out and dry wall over
Remove columns that lead into the dining room--frame out and dry wall over

UPSTAIRS
Stairs
Patch hole in drywall
Replace stairway and make the incline more gradual.
Add internal closet under stairway (the existing closet is on the OUTside of the house)
Replace single-paned window in stair well with a double-paned window
Replace cheap-looking balusters and rails with something more in line with the overall look of the house

Master
Fix the leaky dormers
Organize walk-in closet

Office
Replace desk
Add more bookshelves for storage
Create and install pegboard for material organization
Fix the leaky dormers
Add permanent shelving storage to closet

Laundry Room
Add a removable shelf above washer/dryer that spans the length of the room and the width of the machines to prevent stuff from falling behind the appliances!!!
Properly vent the dryer
Replace carpeting with tile/vinyl/anythingbutcarpet
Install room spanning bar to air-dry clothing

Furniture Projects
Refinish the vintage Henredon bedroom furniture set I scored at ReStore
Refinish mid-century arm chair, upholster seat
Refinish both wood chairs, upholster seat/back
Complete the console table for the foyer
Make a sofa table
Make a large work table/drafting table for office
Make a laptop stand (John’s project!)
Refinish headboard from our first sleigh bed (it’s rather cheap, and the “finish” is starting to chip like crazy)
Build side tables for around the couch

POP THE TOP (the biggest dream of all time!)
Replace 5 tiny gabled dormers at the front of the house with two larger gabled dormers (one in the master, one in the new bedroom)
Add two more large gabled dormers (one in the master and the other in the new bathroom) with a bridge spanning the two (where the new master bath will be!). Similar (but much larger) to this.
Divide up the current large walk-through “bedroom” and separate laundry room into a third bath/laundry room, hallway, and actual bedroom
Add a balcony to master bedroom at backside of the house (new large gabled dormer would have doors that leads to the balcony)
Change opening into walk-in closet from the master bedroom
Replace current French doors and Juliet balcony in the master with windows
Add ceiling! Vent the attic! Add an attic fan! COOL THE UPSTAIRS!!!!!!!

Thursday, September 24, 2009

EW!

File this one under "TMI."

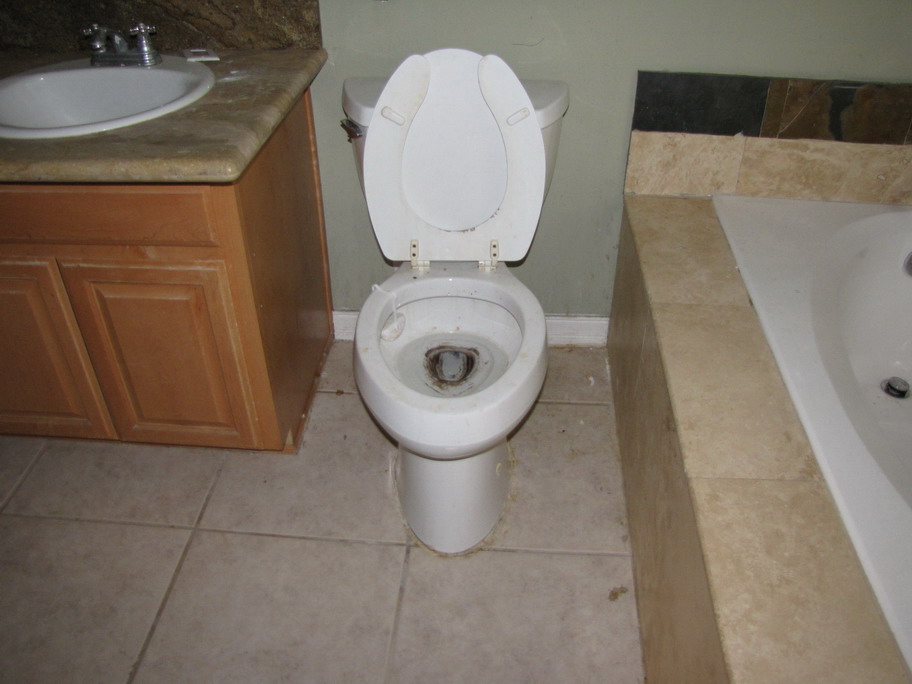
So, last night at around 7:45, John told me that Josh had shut off the valve to the toilet and it looked like the toilet had been leaking.

That is the set-up. You can see where this is going.

Read on only if you choose.

No one would fault you for not.

Consider yourself warned.


Still with me?

I asked him where it was leaking, and he said he thought it was leaking from the front.
Now, we had planned on eventually replacing the toilet with the same dual flusher we put in our on-suite bathroom upstairs. But, aside from it being extremely nasty when we moved in, the toilet downstairs was in good condition and would suffice until we had the money/time/inclination to replace it. John thought it might be a problem with the wax ring, so we rationalized that if we've got to go to the trouble of removing the toilet to check the wax ring, we might as well replace the entire toilet. So while I finished my homework, John sped off to Sam's Club to pick up this beauty (which is eligible for a SWEET rebate from our local energy company and winds up only costing around $10 after the rebate!).

After he got back (around 8:45), we ate dinner while gleefully watching the first half hour of GLEE. I tell ya, it really took extreme will-power to pause the DVR right as Tina started in on "Tonight" from West Side Story. REALLY EXTREME. Like, I think it used up my entire life time supply of will-power, and I will now buy magazine subscriptions from door-to-door salesmen, and donate money to any charity that asks, and accept any request to babysit cats, dogs, rodents, reptiles, babies, and drunks. Yes, THAT much will-power.

But, I paused the DVR, went to the bathroom, and began inspecting the toilet. I felt around the various hoses and gaskets, felt the wall for moisture. Found nothing. I turned the water back on, flushed the toilet several times, and nothing. Paranoid idiots, I thought, and was getting ready to bleach my hands and go back to enjoying Tina's serenade.
Then John walked in and said "See where it's leaking?" as he pointed to the silicon caulking around the base of the throne. The once-white seal had a lovely orange tinge to it around the front of the toilet where it met the floor. I noticed a small bead of water forming in the orange tinge territory, and my stomach sank. Sure enough, the toilet was leaking. Or, more accurately, the water et al wasn't entirely making it down the drain.
Now typically at this point in our little home repair adventures, I'd normally break out the camera and start taking pictures to act as a photographic narrative of what all we were doing and fixing, so that I could later upload them here for you all to marvel at our mad home repair skillz.
But (feel free to applaud) I did not get the camera.
I did not snap away.
I did not record for posterity.
I will not subject you all to that.
(Now I expect applause, so your hands had better be flapping away!)
So instead of subjecting you to creepy crawlies that fear the light, and all kinds of human waste, I will insert a picture of Albert.
Followed by a picture of Elsa.
And for good measure, a cute picture of Sarah's kitty Calypso sticking her tongue out.
And just so he won't feel left out, Elliot, too.We removed the toilet, and while John trashed it, I bleached the hell out of the creepie crawlies that are, evidently, impervious to bleach and continue to creep and crawl. Yay for them. I squished as many of them as I could using the paper towels John was tearing off for me and bleached some more. I sopped up the liquid, and we got ready to seat the new toilet. At this point, we've installed two other toilets, and figured we could be considered OLD PROs and didn't need no stickin' instructions.
I put a bead of silicone around the lip, and John heated the wax ring in the microwave to get it soft. He put it over the drain flange and we lowered the toilet over the flange and through the anchor bolts. The tiles directly behind the toilet are a bit uneven, so we shimmed it as best we could, measured it for level, and shimmed it some more. Then we realized that it really wasn't straight, so we moved it into position, shimmed and leveled it again, and began to tighten down the throne to the anchor bolts. When we were done with that, I looked through the parts bag and noticed that we had forgotten to put the anchor bolt cap and cover into position, so John took the nuts off added the cap and re-nutted the bolts. We then put the tank onto the base, and turned the water on, figuring that the extra weight from the water would help to weigh the toilet down, making it easier to caulk the edge. John flushed the toilet, and then....
Wait for it.....
(You SHOULD be able to see where this is going....)
Water gushed out from under the toilet base.
It seems that, because of all the time we spent trying to get the damned thing in place, anchored, weighted, level, shimmed, and shined, the wax ring shifted. Or, after reviewing the directions for installing the toilet, we realized that perhaps, since the FLANGE doesn't sit above the floor level because of the lovely ceramic tile installed in the bathroom, that perhaps we needed to actually get the little extension thingie that the instructions referred to. The instructions went on to say, "For installations that require the [extension thingie], it is best for a professional plumber to do [it]." At this point, it was 11:45PM, and we were tired and covered in sewage water and said, collectively, "FUCKIT." We told Josh he couldn't use the toilet, and that we'd take care of as soon as we could. We took turns showering and burning our clothing, and went to bed at ~1AM.
When I woke up this morning, I was greeted by a faint putrid smell.
When we went downstairs to head off to work, we were accosted by a putrid STENCH.
Josh said it woke him up.
So, today, between 2PM and 5PM, we're meeting a professional plumber at the house and letting this kind professional deal with the shit.
Literally.

Thursday, July 2, 2009

Let There Be Light!

One of the easier lipstick changes we've made to the house is replacing the existing light fixtures to give a more unified feeling. I'm cheap and always on the hunt for a bargain, but I also have very particular thoughts on what I like and unfortunately, the stuff I like is rarely a bargain. My family members are masters at finding slamming deals at thrift stores, sourcing out cool lamps, chairs, paintings, tables, and other various gems. I didn't inherit that gene, and am frequently left wistfully marveling at their finds. Add in John's teasing/mocking everytime we pass by a thrift or bargain store, and my inability to find something worthwhile, I just stopped going to them, and therefore miss out on oodles of cheap, quality furniture.

When we were first looking for a house, we were REALLY interested in a 1909 Craftsman in a transitional neighbourhood of Riverside. It was a block away from a historic residence, and three blocks away from a local hooker hangout. But it was charming and spacious and beautiful. One of John's karate friends offered to take a look over our offer/the bank's counter offer on the place, and mentioned that he knew of a vendor in Riverside that had a huge variety of period-specific building supplies (windows, door knobs, original flooring, etc). John and I tried to find the place, eager to scope out what it would take to restore the house to its original splendor. Try as we might, we weren't able to find it. But we did find Riverside's Habitat for Humanity's ReStore. Since discovering it, we take one lunch hour a week to stop by and look for bargain-priced treasures ranging from antiques, gently used, to brand-spanking new.
We've since bought several light fixtures to replace the:
* Classy 80s-style gold-toned pieces in the house* Tiny nickle pieces expected to light an entire room
* Euro-style energy-hogging halogens
* Ugly industrial sconces
* Bare bulbs
* And just plain darned un-appealing
Between the ReStore and deals at Costco and Amazon, we've been able to swap out almost all the lights in the house to only a few different styles with a unifying appearance.
The halogen pendants in the downstairs bathroom, kitchen, and the foyer were switched out for these ($30 each from ReStore)
For the sconces throughout the stairwell, and the upstairs office/bedroom and the laundry room, we put in these ($15 each at ReStore)
A new pendent in the dining room ($35 at Restore)
More light in the windowless upstairs on-suite bathroom ($15 each at Costco)
We added a ceiling fan to the AC-ventless living room by replacing an ugly gold-toned light (biggest splurge at $99 from Amazon)

The ceiling fan was an ordeal, so I'll post about that separately, later.

All in all, I'd say we've spent around $340.

Now all that's left is the puny industrial sconce in the master bedroom (1-bulb to light an enormous room!) and add another ceiling fan in the living room. Then we can tackle the outside lighting! Man, I feel accomplished.