Wednesday, December 30, 2009

In the Time it Takes to Bake a Sweet Potato (YAM) Souffle

Along with mashed potatoes (for which I'm evidently famous—or infamous?) and chocolate lava cupcakes, I was asked to bring a sweet potato (YAM) soufflé to Thanksgiving dinner with John's family. After I got the ingredients mixed together and popped them into the oven, I set the timer for 35 minutes. I then decided to give my itchy trigger finger some exercise, grabbed the staple gun, and set about reupholstering one of the beautiful mid-century chairs I had purchased from Habitat for Humanity’s ReStore.
As a reminder, this is what it looked like:
And here’s the post I first mentioned it.
Actually, my little adventure began a few days earlier, when I drug the little beauty out to the garage and ravaged it.

My mom turned me onto a product called Restor-A-Finish, made by Howard. She used it--with great success--on my dad's heirloom upright piano, and my aunt used it on it to restore some 1960s era kitchen cabinets. After I striped my chair of her cheap vinyl seat, and set about restoring her luster.

Howard, your ish is da bomb! Who knew the veneer on my little chair was so freaking stunning! Restor-A-Finish brought out the lovely wood tones, the complex swirl patterns of the grain, and made the beautiful, delicate lines of the piece really stand out.

My next task was removing the vinyl from the seat bottom. I've really gotta hand it to the original assembler of this piece; their utter LOVE of metal staples was wholly evident. It literally took me longer to remove the staples than it did to restore it!

I took this opportunity to make sure all the joints were secure by tightening screws and malleting blocks back into place. The chair oughta survive another few decades!

So that brings me back to where I put my lovely sweet potato (YAM) soufflé in the oven. Armed with quilting batting and a staple gun, I set about dressing up my freshly restored chair.

Now, I'm sure there are a myriad of ways to reupholster chairs, ways that are easier and more elegant than what I did, but I'm a novice and naïve and have an over-blown sense of self-confidence, so this is what I did.

First, I used the seat as a template. I rolled out the quilting batting and set the seat on top. Using a fine-tipped permanent marker, I traced the seat onto the batting.

Next, I more or less carefully cut out the batting using standard scissors.

The fabric I decided to use for this application has a very subtle diamond pattern to it. I don't know my fabrics too well, so all I can say is it's like a synthetic velvet and it's pretty and soft. Since the pattern is very subtle, I wasn't too worried about getting the lines straight/making it perfectly symmetrical, so I just placed the wooden seat on top of the wrong side of the fabric, and traced the shape out using the permanent marker again. When I cut it out, I cut about 1" from the line so I would have enough fabric to accommodate the batting and easily staple to the seat. In retrospect, I probably should have cut 3" so I'd have more fabric to grab, but it worked out ok with LOTS of tugging with just the 1".

Here's a shot of the seat, the batting, and the fabric.

Surprisingly, the original batting was still in decent condition, so I decided to reuse it and ignore the icky thought that a myriad of people have farted into the batting over the years. Here you can see the different layers.

I turned everything over, and got ready to staple. Now, if I had been S M R T, I would have thought ahead to put the side of the seat that already had the screw holes in it facing up so when I went to reattach the seat, I didn't have to bore new holes, but I'm clearly not S M R T and forgot to do that. If you try your hand at reupholstering something, be S M R T and make sure you can easily reattach the seat after you're through.

I first stapled all four corners of the fabric to the board, pulling the fabric taut as I stapled. Divide and conquer!

Then I stapled the middle of each side's length, again pulling the fabric taut.

Not a bad start. Here's what the right side looked like.

I continued pulling the fabric, and stapled to my heart's content. And I wanted to be extra certain that the fabric wouldn't rip, so I stapled stapled stapled the corners until I'm sure there's more metal than wood!

Here's what it looked like after I got all the staples in.

As I finished up boring new screw holes into the seat, the timer on the oven went off, and I removed my beautiful sweet potato (YAM) soufflé.And then snapped a shot of my newly restored/reupholstered mid-century side chair!Not too shabby! All in all, I think I spent around $25 on the project ($10 for the chair, $8 for the Restor-A-Finish, and $7 for the fabric/batting...and I have plenty of Restor-A-Finish and fabric/batting left over for other projects, so the real cost of the chair is closer to $15). Here's the Flickr gallery of it with larger photos, if you're interested.

Monday, December 7, 2009

Kraft Paper Laurel Wreath

A confession: I hate Martha Stewart.

I think it's because she's so darned stylish and smart and savvy and seemingly frigid. I hate her perfection. I look at her and her perfect crafts/creations and I am Jack's raging bile duct and I get the unmistakable impulse to "destroy[] something beautiful."
And yet I cannot help but LOVE most everything she does. When I go through the issues of Martha Stewart Living, I say aloud "I hate Martha Stewart" every time I rip out a series of beautifully staged photos and how-tos (John can attest to this). I cursed myself when I was seduced into ordering Martha Stewart's Encyclopedia of Crafts and I whined each time I placed a sticky note on the pages so I'd remember exactly which projects I wanted to try first, second, third, fourth, fifth......hundredth.

Last year, I saw this wreath project in her magazine, and resolved (!) that I would make one for myself.
While I was fighting off teh pig plague, I made it, with a few notable exceptions:
Folding the strips of Kraft paper accordion-style works ok, but it takes SO much time to do it. So instead, I cut 2-3" strips of craft paper, folded it down the center length-wise, and then cut out the leaves down the length of the strip. It made it fast work, and ensured each leaf would be shaped a little differently from all the others.

I also made some leaves with scalloped edges--I just twisted the scissors slightly as I cut. I suppose I could have used some edger scissors, as well. I just did this so there'd be some variation in the leaves.

I didn't have the fancy schmancy metallic paper, so I took some gold-coloured acrylic craft paint and watered it down a LOT. I then lightly brushed it onto some random leaves I had already cut out. I painted one side and let it dry as I painted more, then I went back and painted the reverse side. I took the same paint and added some red acrylic craft paint to give it a more burnished hue, and painted some more leaves, using the same rotation as before (fronts first, then backs).

Stapling DID not work. It was impossible to staple the leaves to the wireform and have them actually stay on (typically, the staple punctured only one part of the leaf, and it could rip out VERY easily). After trying to staple a few on, I gave up on got the handy glue gun all hot and bothered, and glued the leaves to the frame. This was WAY easier than the stapler, and I think it'll ensure the finished product will survive for many years to come.
I didn't have any pretty satin ribbon, so I used two lengths of 1" grosgrain ribbon in slate blue and sage green. I think the two tones look nice, and the grosgrain gives it a certain earthiness that it wouldn't have with satin.

When it was done, I attached a 3M Command Metal Hook to the inside plate glass window in the foyer, and hunt it there, so it's visible from the street. It matches our Chocolate Lava excellently.
Anyway, here's my finished product:

Click here for more piccies/enlargements of the ones above. And doesn't it look beautiful on my lovurley wool peacoat?

Thursday, November 12, 2009

Musical Chairs

I think I have delusions of grandeur.

My delusions deal with furniture restoration.

In the past, I've been able to deny my urge to rescue distraught furniture from dumpsters and street curbs and thrift stores.

It started with the big gold monster chair my dad snagged for me when I was a freshman in college. I don't really remember its providence (thrift store? back alley? port of authority? immigration holding cell??); I just remember that it rocked my world so much harder than any standard issue desk chair. Sometime mid-year, something--that might or might not have involved alcohol-fueled clumsiness (someone else's, I assure you!)--happened to it , and it became incredibly wobbly and would topple over at random times. You gotta understand that this chair was huge and heavy and swiveled on a pedestal base, and quite reminiscent of Martin Crane's chair in Frasier (you know, the big ugly arm chair that offended the minimalist sensibilities of the titular character):


I tried my best to resurrect the beast, but by the end of the year when it was time to move out of the dorm room and put my stuff in summer storage, I felt it was time to let go of the behemoth. It's probably sitting comfortably in the summer 1998 layer of the Canyon County landfill, being much loved by vermin.

When I moved down the California, my mom gave me a chic striped Asparagus Green and Amber velvet upholstered tub chair with a wooden frame and rattan inserts that was once my great aunt Clara's. It's a striking piece of furniture, and I love love love it. I've meant to re-upholster it for the last 8 years, and it's still on the to-do list (and keeps getting shifted further and further down).

My reupholstering delusions of grandeur are firmly rooted in how freaking easy Trading Spaces makes it look. If Hilde can do it, I reason, so can I!

But like I said, I've managed to keep my dark urges to rescue distraught chairs from the clutches of obscurity very very well.

Until we bought the house and started frequenting ReStore.

Meet our new friends at the house:

One of the six side chairs that came with our new-to-us dining room table. They're kind of ugly, but they're kind of growing on me. I think I can successfully spray paint the metal and change the fabric on the seat pretty easily, and they'll look infinitely better.

One of the two arm chairs that came with the dining room table. Albert likes the fabric on the seats--especially for scratching.Horray for ReStore! I got these next two beauties for $20 for both. I love their mid-century looks. The arm chair's latest home is up in our bedroom.The side chair I use as my computer chair. I used Restore-A-Finish on the side chair last night, and took the vinyl off the seat. I'll post pictures as soon as I have the new fabric in place. A few weeks ago at ReStore, we found these next two chairs sitting out front. They didn't have any seats/backs and looked shabby at first glance, but my heart was a-flutter because I loved their lines. A closer look at them, and I realized that they very likely came from a carpenter's workshop. They're solidly built, and will look magnificent once they're finished.

This is a detail shot of the chair's arm. You can see pencil marks on it, from where the craftsman had intended to carve out an art deco-esque pattern. I found some lovely Liz Clairborne upholstery fabric at Joann's that I think will look STUNNING on these chairs. I'm VERY excited!
This chair is just beautiful. It's vaguely neo-classical, and I just love it. I think I'll strip it, restain it a darker colour, and then use the same fabric I'm using for the chair above.

A detail of the carved legs.
Now that I'm done with my special Christmas project for all my family members, I can move onto my refurbishing dreams. Stay tuned!

Wednesday, November 4, 2009

Bats in the Belfrey

We lived at the condo for three and a half years, during which time we had three Halloweens come and go. The first year, we did nothing (went to see a movie, I believe). The second year, I got three faux pumpkins and carved them up, and set them on the porch area in front of our door, bought a large vat of Tootsie Rolls and waited for the trick or treaters. The day after Halloween, our Tootsie Roll supply had been depleted only by the ones that we had chowed down on, as there had not been a single trick or treater. Last year, we did the pumpkins again, but I got choice Hershey bite-sized candies, thinking that the kids would smell the CHOCOLATE and be enticed to knock on our door. We had ONE trick or treater, a 13-14 year old kid dressed in a hoodie and carrying a back pack. Pah-thet-ick.

So I had high hopes for this year when October rolled around, and many many many homes in the neighbourhood pulled out elaborate Halloween themed decorations with everything from creepy spider webs with gigantic spiders to full-on haunted forest set-ups with mummies and monsters. Not wanting to get my hopes up, I resolved to keep things modest and not decorate until the day of (my plans were also largely dictated by the horribly time consuming business law course I was enrolled in at the time). I bought a large real pumpkin and snagged four more faux pumpkins on clearance from Michael's. After I finished up my final for my class, I started carving the faux pumpkins. BEHOLD
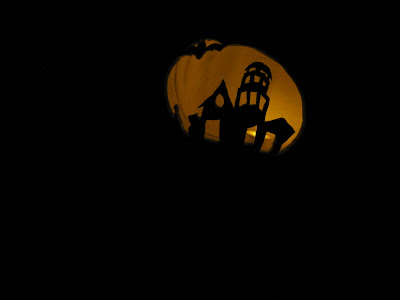
The kitty face and bat cave are the pumpkins that I carved two years ago--the bat cave hasn't held up very well, and there's now only one bat left and I had to staple his wing back on.

Then on the 29th, I decided we didn't have enough real pumpkins and that I really wanted the faux spider web stuff to put on the porch and that we just had to have it, so I drug John around to various places for more pumpkins and webbing. Rant: Vons wanted $15 for a pumpkin that was a good bit smaller than the $3.54 pumpkin I snagged at WinCo a week before. F-them! So we got some slightly smaller pumpkins at Trader Joes for $3.49 each.

Then I got to thinking about how long our driveway is, and that the incline probably isn't that enticing to little kids, and the fact that we don't really have a lighted path up to the house and the stairs leading up from the driveway are kind of sloppy and irregular and that since we're homeowners, we are not LIABLE for injuries. So I convinced John that we needed to light the path, and ran over to a Dollar Tree to look for something to do just that. I picked up (10) clear glass cylinder vases, took them home, and painted Halloween-type silhouettes on them using black acrylic paint. I added a cup of rock salt to keep them from slipping down the hill, and used large tealight candles. Behold! I also decided that 10-vases wouldn't be enough to light the path, so I picked up some brown sacks and drew some silhouettes on them using black permanent marker, as well. For extra weight, I added a cup of rock salt and used flameless battery-powered "candles." Behold! Saturday was a busy busy day, as we went to a woodworking trade show out in Costa Mesa (about 60ish miles) and then to Ikea in Costa Mesa (to return some broken/unneeded items that were purchased on our last trip). I still hadn't carved the real pumpkins and put out the spider webbing (John needed to clean leaves off the driveway first, and he did it in the morning before we left for Costa Mesa). So as soon as we got home, I got busy threading the spider webbing on nails and staples and hooks that the previous owner of the house had left. BEHOLD!
We have a portal to (hell) the crawl space under the house, so I put webbing there, too. Behold!John helped me put out some more staked solar lights we purchased several months ago, but never bothered to put out.

Then I started putting out the various votives, luminaries and faux pumpkins. BEHOLD!
I quickly cleaned and carved the real pumpkins. I had high hopes that John and Josh would like to relive their childhood glory days and get in on the carving but, alas, they refused and each went off to play whatever video games they wanted. :o( Woe was me.

I didn't have time to do something fancy and cool like I'd done in the past, so I settled with traditionally carved faces. Behold! John had been using the power drill to put out more solar-powered light stakes along the driveway, so I snagged the drill and "carved" the final large pumpkin. Behold!
There was one more real pumpkin that I got a chance to carve, but it looks like I didn't get a picture of it. So I guess I'll have to say that it was THE BEST PUMPKIN CARVING ever and you'll just have to imagine how AWESOME it was and that it made that pathetic face look even more pathetic.

While I was getting everything ready, I could hear the sugar-fueled laughter of kids a few streets over, and I got excited that we'd FINALLY have trick or treaters (I cannot really explain my desire for trick or treaters. I swear it's not evil witch-like from Hansel and Gretel. I just like the thought of kids getting hopped up on candy and terrorizing their parents).

After I was satisfied enough that we had adequately lighted the pathway so as to limit our liability, John and I enjoyed a nice Costco pizza and watched Let the Right One In as we waited for the trick or treaters.

And we waited.

The whole freaking night, we had FOUR trick or treaters. The first two were 12-13 years old and had a back pack for candy (WTH is it with teenagers and backpacks!?). The second two were a little more appropriately aged 7-8 year olds, and for their effort of trudging up the drive way, they got a nice handfull of Almond Joys and Reese's Peanut Butter Cups and Whoppers.

Lessons Learned:
  • Draw your silhouettes on the side of the paper bag that does not have the seam
  • Use white paper bags rather than Kraft paper bags, as they'll create more light
  • Bees are attracted to flames just as much as moths, and make interesting encaustic-esque sculptures when they get too close to the flame.
  • Power drills are awesome pumpkin carvers, but they might quite a bit of mess (Linda Blair would've been proud). I recommend using them outside *or* cleaning up IMMEDIATELY as pumpkin guts practically fuse to granite when they're dry.
  • Glass vases are very easily painted with acrylic paints. I suppose that if I wanted to keep the paint on them, I could spray them with clear spray paint. As it is, I think I'll reuse them for other things, so I'll just scape off the paint.
  • I need to start earlier!
  • Finally, the most important lesson learn: just because you build it doesn't mean they'll come. :o(