
 And it sat in our dining room for several weeks. Around Christmas, when I was getting the house cleaned up for hosting John's family for Christmas dinner at our house, it got stacked on top of the other rescue-chair and placed in the spare bedroom. Then in February, I got the itch to DOSOMETHING with it, so it went out to the garage.
 I first set about sanding it. Stupid, I tried it by hand. Even with the 80-grit paper, I was getting no where. So I pulled out John's oscillating power sander and got to work sanding the sucker down. First 80, then 100, then 200.
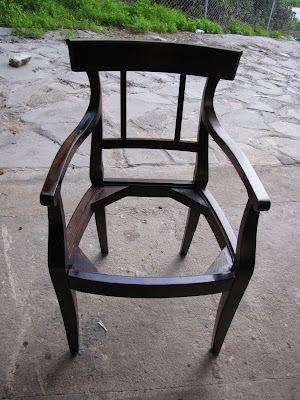
After, oh, about 2-straight hours of sanding, I was satisfied that it was ready for staining.
 I used Minwax Poly Oil in Red Mahogany, because that's what I had on-hand at the time, and I tend to prefer darker woods with red undertones (no oak for me!).
 I applied the stain using a sponge brush, and it worked out quite well. After letting it set for 20 minutes, I removed the excess stain with a rag. And it looked blotchy as hell. I was disheartened, and appealed to John's vast knowledge base of woodworking techniques. A second coat, he recommended.
 And Boy oh Boy, did the second coat make a difference! Didn't it look much better?
A few days later, I was ready to apply the clear coat. I used a matte-finish Minwax Poly that worked with the oil stain.
 I applied three coats, because that's what's recommended by the manufacturer. There are some slight imperfections in the coats, but I was alright with them and decided to stop futzing--after all, it doesn't have to be PERFECT.
Next I set about making the seat. This was a pain in the butt. First, I cut out a square from a sheet of crappy 3/4" plywood we had sitting around (NOT furniture grade, just the cheap stuff from Home Depot that we had originally purchased to make a work bench and never got around to using). I then cut out a large piece of clear plastic bag, and taped it to the seat of the chair. Using a marker, I traced out the seat-ridge on the chair, so I'd have a template to apply the the plywood. I cut the plastic to size, and then traced it onto the plywood. I started out using the band saw, but there's something up with the blade because it kept going off at weird angles. John wasn't around to help figure out what was wrong with it, so I just soldiered through. I also tried using the jig saw to cut it, but I think I was using the wrong kind of blade because it kept CHEWING up the wood without REALLY cutting it. I managed to whittle away enough wood to get it to sit correctly on the seat, so I was happy. The wood bottom for the seat looks HORRIBLE, but I figured that since it'll be covered with fabric, who cares? I (smartly) didn't take any pictures of the horribly ugly seat, so I will spare you the sight.
I then took the chair and seat into the house, and attached the fabric in the same way I did with the other chairs I reupholstered.
I bought a 2" foam pad, and once I got the fabric on, I decided I didn't like it much--it resembled a mushroom, and wasn't the sleek look I had in my mind. So at SOME point in the future (who knows when?), I'll redo it. But for now, I'm happy with it. I think the chair looks lovely, and I'll ignore the puffy set with the off-center pattern, and enjoy the new seat in the living room.

Click here to see more pictures of the process (no commentary, just pictures). All in all, I think I probably spent, oh, 6 hours working on the chair. Here's the budget breakdown.
Chair: $10
Fabric: $10
Stain: Already had
Clear Coat: $5
Sandpaper: Already had
Foam Pad: $12
(Mostly) Finished Product: Priceless
I'm going to start working on the other chair we bought at the same time, sometime soon.
No comments:
Post a Comment